Showing posts with label foraging. Show all posts

Sunday, April 21, 2013

Dandy Veloute over Polenta

Dandelions; the plant people love to hate. Sadly, I've seen many of my neighbors out spraying Round up on them numerous times. If the overspray could only be contained to their yards...... the city of Seattle frowns on using herbicides, but until they ban them from sale, like they did the plastic bags, people will use it.


But why spray dangerous chemicals on the ground when you have a free source of nutritious food popping up? Dandelions were brought over from Europe for their food and medicinal value. You can eat the whole plant from root to flower. The roots make a tasty coffee substitute and an environmentally friendly one, too, as they are right out in your yard rather than in a far off country. The leaves can be used in salads or as a cooking green. The flowers can be used to make wine or fried as battered fritters or sprinkled in salads. They're often an ingredient in bitters, which I plan to try to make one day.

 A breakdown of the USDA listing of nutrition is here. They are particularly high in vitamin K and have lots of minerals. If you are avoiding iron you may want to limit your intake. The French nickname piss-en-lit  describes its somewhat diuretic effects, however, dandelion also replaces the potassium loss that happens with prescription diuretics. The word "Dandelion" is a variation from the original French name of the plant, Dent de Lion; lion's tooth, because of the serration of the edges of the leaves, although different species have quite a bit of variation.

Dandelions are in the asteraceae family, which is a ginormous family of plants that also includes sunflowers, and Cat's Ears which are fuzzy and also edible; their leaves don't get as bitter as dandelions, but they also have somewhat less nutrition, I've been told.

This recipe is somewhat foodie, but also comfort food. The Dandy Veloute is somewhat bitter, but the perfect complement to the bland polenta and somewhat sweet carrot puree. I used a broth I made from the shells of 1 lb. of shrimp, but you could use any broth. I like to find multiple uses for my foodstuffs and see just how many things I can come up .


                                                  Dandy Veloute
Printable Recipe


Ingredients: Carrot Cloud
       
                  6 large carrots, chopped into large bits
                  1 large russet potato, chopped into large bits
                  1 tbs. lemon juice
                  5 bay leaves
                  rest of can of coconut milk after dividing, see Dandy Veloute
                 3 tbsp. coconut oil
                 salt to taste

                 Broth

                 shells from 1 lb of shrimp
                1/2 cup white wine
                6-7 cups of water, you want to end up with 6 cups after simmering.
or just use 6 cups of broth of choice

               Dandy Veloute

               5 loosely chopped cups of dandelion leaves
               1/2 onion, chopped
               1/2 cup white wine
               1 cup broth
               1/14 cup coconut milk
               2 tbsp. coconut oil or olive oil

              Polenta

              2 cups dry polenta
              5 cups broth, 1 cup water
              salt and pepper to taste

      for the carrot puree cloud: in steamer pan add water and 5 bay leaves to bottom. Steam carrots and potatoes until tender. Add them and the rest of the cloud ingredients to a blender and blend until smooth. Put into a holding container, try not to devour it while making the other parts of the recipe.

     for the broth: simmer the shrimp shells white wine and water for about 1/2 hour. Strain out the shells.

      for the Veloute: Heat the oil in a large skillet. Sautee the onions until they soften but do not brown. Add the white wine, then 1 cup of the broth and simmer for 10 minutes. Put them in the blender along with the dandelions and coconut milk. Blend until smooth and creamy. Set aside or in a pot on the stove on low until polenta is ready.

      for the polenta: Put the dry polenta into a large saucepan. Add the broth and water and salt and pepper to taste. Bring to a boil, then lower the heat and let simmer until softened and thick. Stir occassionally to prevent burning on the bottom.

     I sauteed a thinly sliced tomato and about a 1/4 onion in olive oil as a flavorful garnish to put on top. (optional)

     Once all parts of recipe are ready: spoon polenta into a serving bowl; put a tablespoon of butter or butter sub on top. (optional, but yummy) Spoon carrot cloud over polenta. Spoon Dandy Veloute on top. Top with garnish if using.
 
                 Enjoy!

Let me know if you try this recipe and like it. I see lots of views of my posts, but rarely get comments. I'd love to know how you liked it or what variations you might have come up with.

Thursday, November 29, 2012

Dock Seed Cake

I came up with this recipe for this month's Wild Things Roundup, the theme of which was "Seeds" 

To check out more interesting forager recipes, be sure to click on the link above!

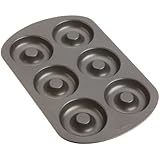
My first ambition with this recipe was to make donuts. I'm obsessed with donuts since I found this donut pan from Wilton.


While looking up the image, I see they have a heart-shaped donut pan. Love.

Now I haven't had a donut in over 10 years, since going gluten-free. You may remember my wistful post a couple months ago about picking up donuts at VooDoo Donuts for the bf. Admittedly, these are more like donut-shaped cupcakes, but they're close enough to make me very happy.

That said, upon trying the first batch, I felt the dock seeds had a hearty texture that didn't really seem 
donut-y, so, I poured the rest of the batter into a jelly roll pan and made a low cake. I still was a little iffy on the texture for a cake, but the bf said they were good and grabbed three to take to work. Go figure, I'm usually the earthy one. 


So, here's the recipe:

4 eggs
1/2 cup unsweetened grape juice, or other liquid of choice
1/2 cup molasses
1/2 cup grated carrot or other veggie, pumpkin for example
1/3 cup melted coconut oil
1 tsp. vanilla
3/4 cup almond flour, although this was a bit moister than I like, I may try up to 1/2 cup rice flour next time
1/2 cup ground dock seeds
1 tsp. baking soda
pinch of salt

Mix wet ingredients in a bowl. Mix dry ingredients in a bowl. Add one to the other.mix thoroughly pour into well-greased pan of choice. Bake at 350* for approximately 30 minutes, times vary with your oven and altitude. Cake will be firm when done. I always find I need to cook gluten-free recipes a little longer than I think I do. When you think it's done, leave it 5 more minutes.

Thursday, June 28, 2012

Chocolate Roses

I recently read a post on Plant Journeys about making skin oil with coconut oil and roses; and the most interesting part of the post to me was using the strained rose leaves to make chocolate treats! You can read her process and recipe by following the link.


So I had to make it for myself. I don't have an actual recipe to share, as this was one of those moments that I was "in the zone" and not measuring, but I can describe my process. 

I put the strained, chopped rose petals and some chocolate in the top of a double boiler. ( I chopped the rose petals before steeping them in the coconut oil, and my double boiler is just two small pots, one on top of the other, with the simmering water on the bottom.) I added a splash more coconut oil. As the chocolate melted I added some chopped pecans, a few spoonfuls of pomegranate juice, and a pinch of cardamon. Once it was all mushy, I spread it out in a pan lined with waxed paper. Then I put the pan in the fridge so the mixture would harden, at which point I broke it into pieces and stored it in a sealed container back in the fridge. I'm down to the last two pieces, so I'm going to have to make some more!

Addendum: I found my original bit of paper where I wrote down quantities; so it was 1/2 cup chocolate to 2 cups strained rose mast (soaked in coconut oil), another 1/8 cup coconut oil, 1 tsp. of the juice. 

One of my goals for 2013 is to become more organized and keep all my recipes and formulations in one spot.


I discovered an interesting thing about  pomegranates. They will keep in the fridge a long time for use in summer recipes..... although it's a bit hit or miss which ones will keep and which ones will rot.


Sunday, March 18, 2012

Free Flowers

While out and about in my neighborhood, I often come across pretty plants that are in parking lots or just happen to be on the side of the road, in public areas, and quite often I can even fashion a flower arrangement from something in my yard. I like having some greenery inside the house, and even more so when it is free! Lately I noticed some beautiful blooming camellias on the side of the road along the road that borders the fenced off airport property. They are not in any one's yard ( I wouldn't pick from someone's yard unless I knew them awfully well and had permission). In any case I only needed a few branches to make a bouquet (because I would never deflower a whole plant or make it look ugly, either). But picking a few blooms or branches from a plant in a public area never hurt anyone, and it cheers me up to see them in the house. I took a walk and got some exercise and collected some blooms.

I got enough for a good sized vase:


and another small sprig in a small vase:


I've also made arrangements using plants in my yard, even common plants can make a beautiful arrangement like fall arrangements using bits from my corn after harvest, or grasses, branches of holly and pine for winter holidays. Another idea is individual flowers floating in a bowl of water; it doesn't last long, but at the price it doesn't matter. 

It's also a good way to train your eye to see all the beautiful living things around you each day, and get out of the compartmentalized, store bought mentality. 


Friday, January 13, 2012


Stinging Nettle Beer in time for spring. Last week it was very warm for winter here, and some of the early spring greens started trying to grow. It's back to frost, but it reminded me to be prepared when Spring does come to visit. One of my favorite recipes from last year was this stinging nettle beer recipe adapted from several recipes in Sacred and Herbal Healing Beers, one of my bibles for fermented beverages.

Stinging Nettle Beer
5 gallon pail of nettles
Large handful of cleavers
Large handful of dandelion leaves
2 inch piece of gingerroot, shredded
2 lbs. sugar
1 packet Premier cuvee dry wine yeast

Place the washed plant matter and ginger into a large pot and add enough water to cover. Bring to a boil; lower heat and simmer for about 15 minutes. Strain, squeezing out juices and stir in sugar while still quite warm. Add plant fiber to compost as nettles make a fantastic compost addition. When the liquid is lukewarm, add yeast and pour into carboy. Add additional filtered water until you have 5 gallons. Place airlock on top and let ferment for several days. Once fermentation has stopped, beer can be bottled. To get a nice fizzy beer, add a tsp. of sugar to each bottle before closing and shake. If adding sugar, wait about a week to try one. Last year, using the same amount of sugar in each bottle, I had varying rates of carbonation. This recipe can be done without the cleavers and/or dandelions. Dandelions add a bitter edge to the beer, but are very nutritious. I started using the dry wine yeast for herbal beers at the suggestion of the guy at the brewery supply  store and it really does give herbal beers and ciders a superior flavor.
Sacred and herbal healing beers: the secrets of ancient fermentation [Book]

This herbal beer could be considered a traditional spring tonic; it's high in minerals and ginger is a digestive aid. It's a nice excuse to drink a fresh herbal beer. I like these for the nutritive qualities, but also as a gluten-free person; it's a beer that I can drink. Cheers.

Saturday, December 24, 2011

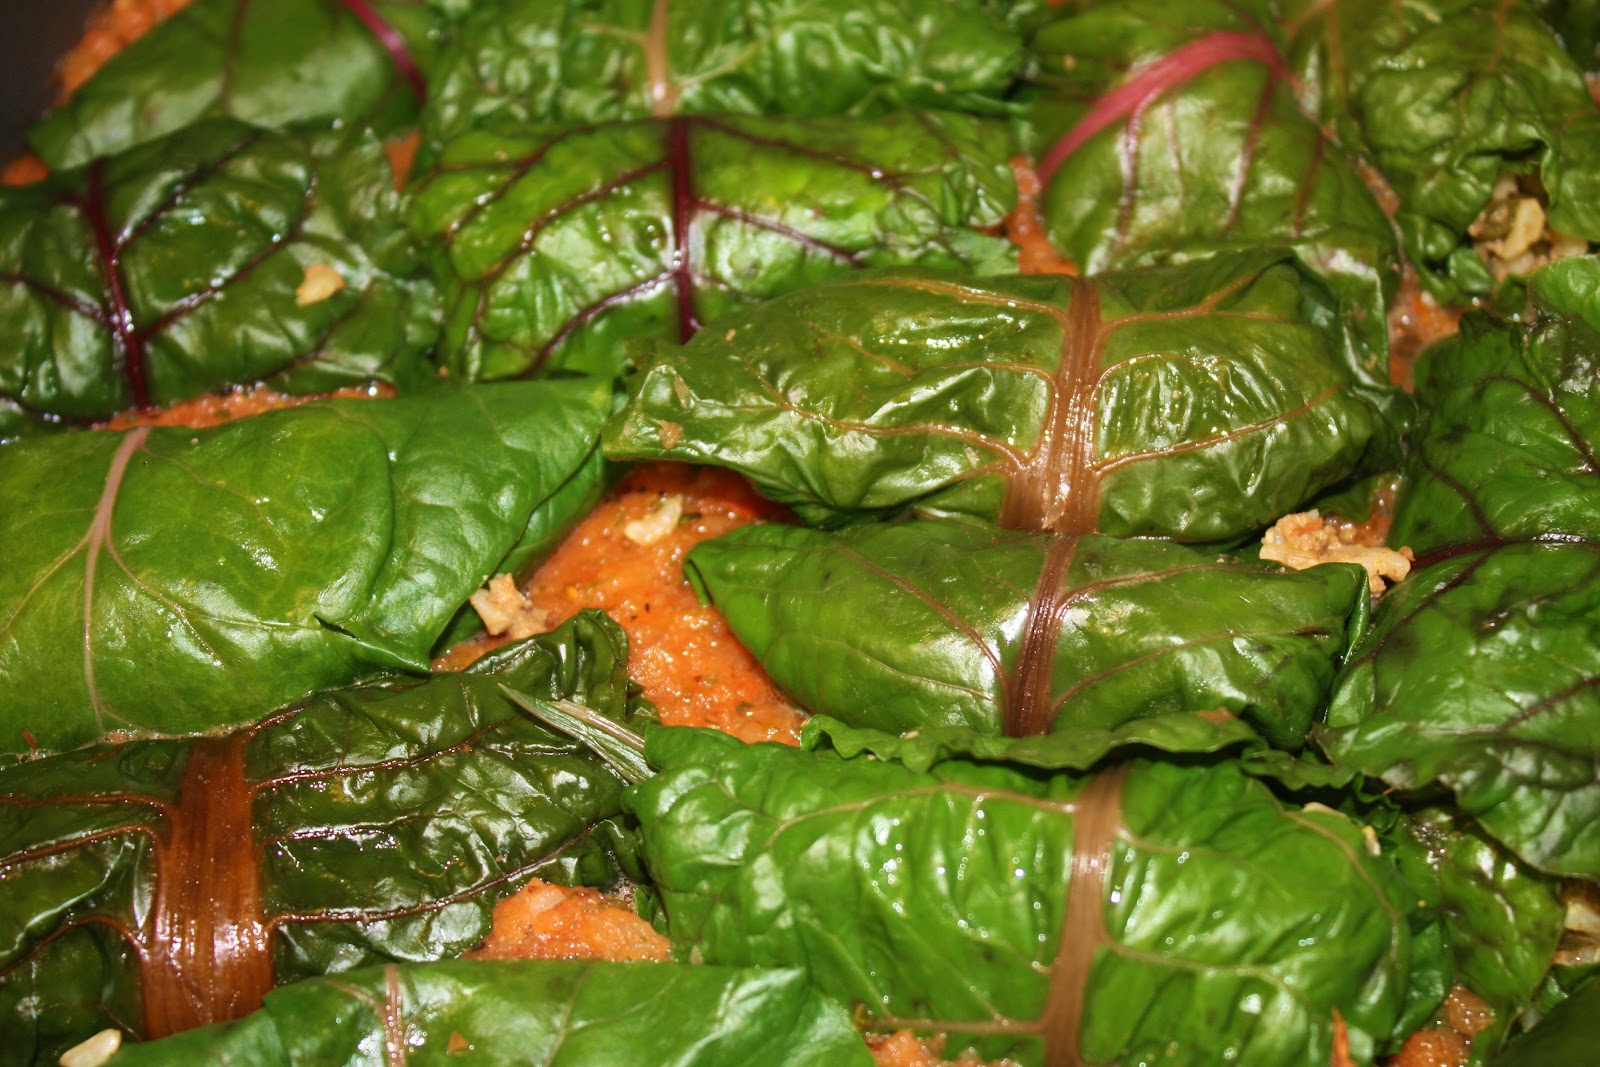
Dock Rolls

In anticipation of the coming spring greenery, and because I haven't managed to construct a simple cold frame as of yet.... here's one of my favorite recipes for Dock leaves. What I find around Seattle is Broadleaf Dock or Rumex obtusifolius , although there are several kinds of dock plants. The plant contains tannins and oxalic acid, which are classified as slight toxins and laxative, although so do alot of other plants we eat. I blanch and then cook them, so I haven't noticed any issues. If you are sensitive to other plants with oxalic acids you might want to avoid them. Any time you forage for plants you have never eaten before, be sure you are correctly identifying the plant and try just a small amount the first time. Learning from an experienced local is always a good idea. That said, like most greens of spring, dock is also known as a liver tonic.


Dock Rolls

@ 16 medium to large broadleaf dock leaves
3 tbsp olive oil
1 lb. ground turkey or lamb
2 cups of water
1 onion, diced
1 cup of rice
2 tsp. pumpkin pie spice
pinch of salt
2 tsp. each of ground cumin and ground coriander
2 tsp. chopped parsley
1/4 cup raisins
1/4 cup chopped nuts of choice, you could use almonds, walnuts, pine nuts, hazelnuts
2 cloves of garlic minced
optional, parmesan cheese

Sauce
15 oz jar tomato sauce 
1 clove garlic, minced
2 tsp. ground cumin
2 tsp. ground coriander
salt and pepper to taste

In medium saucepan bring to a boil meat, onion, garlic and spices. Take off heat and let sit for @ 10 minutes, then drain reserving 1/2 cup and save the rest for another purpose. (makes a nice base for a soup stock, for instance). Put strained meat and onions into a large bowl and add rice, salt, raisins, parsley, and nuts. Mix.

Pre-heat oven to 350*

In a medium pan bring some water to a simmer. In batches, dip the dock leaves for a few seconds each and then rinse with cold water in a colander. This step is a pain, but it seals the nice bright green color in the leaves so they don't turn brown in the baking dish. This is true whenever you want your greens to stay a nice bright green. Drain the leaves. Lay a leaf on a plate and put a couple of spoonfuls in the middle of the leaf; fold in the sides slightly and roll up. Place each one as finished with the rolled edge down, in a baking dish, 9 x 13" . I have also done this in a large skillet with a fitted lid at low heat.Mix together all ingredients for the sauce and add reserved juice from meat.  Once all the rolls are in the dish top with the sauce. Cover dish with foil and bake for about 35 minutes. Dish should be bubbling. If desired, top with parmesan or other cheese and bake uncovered for another 5 minutes. Enjoy.


Monday, November 7, 2011

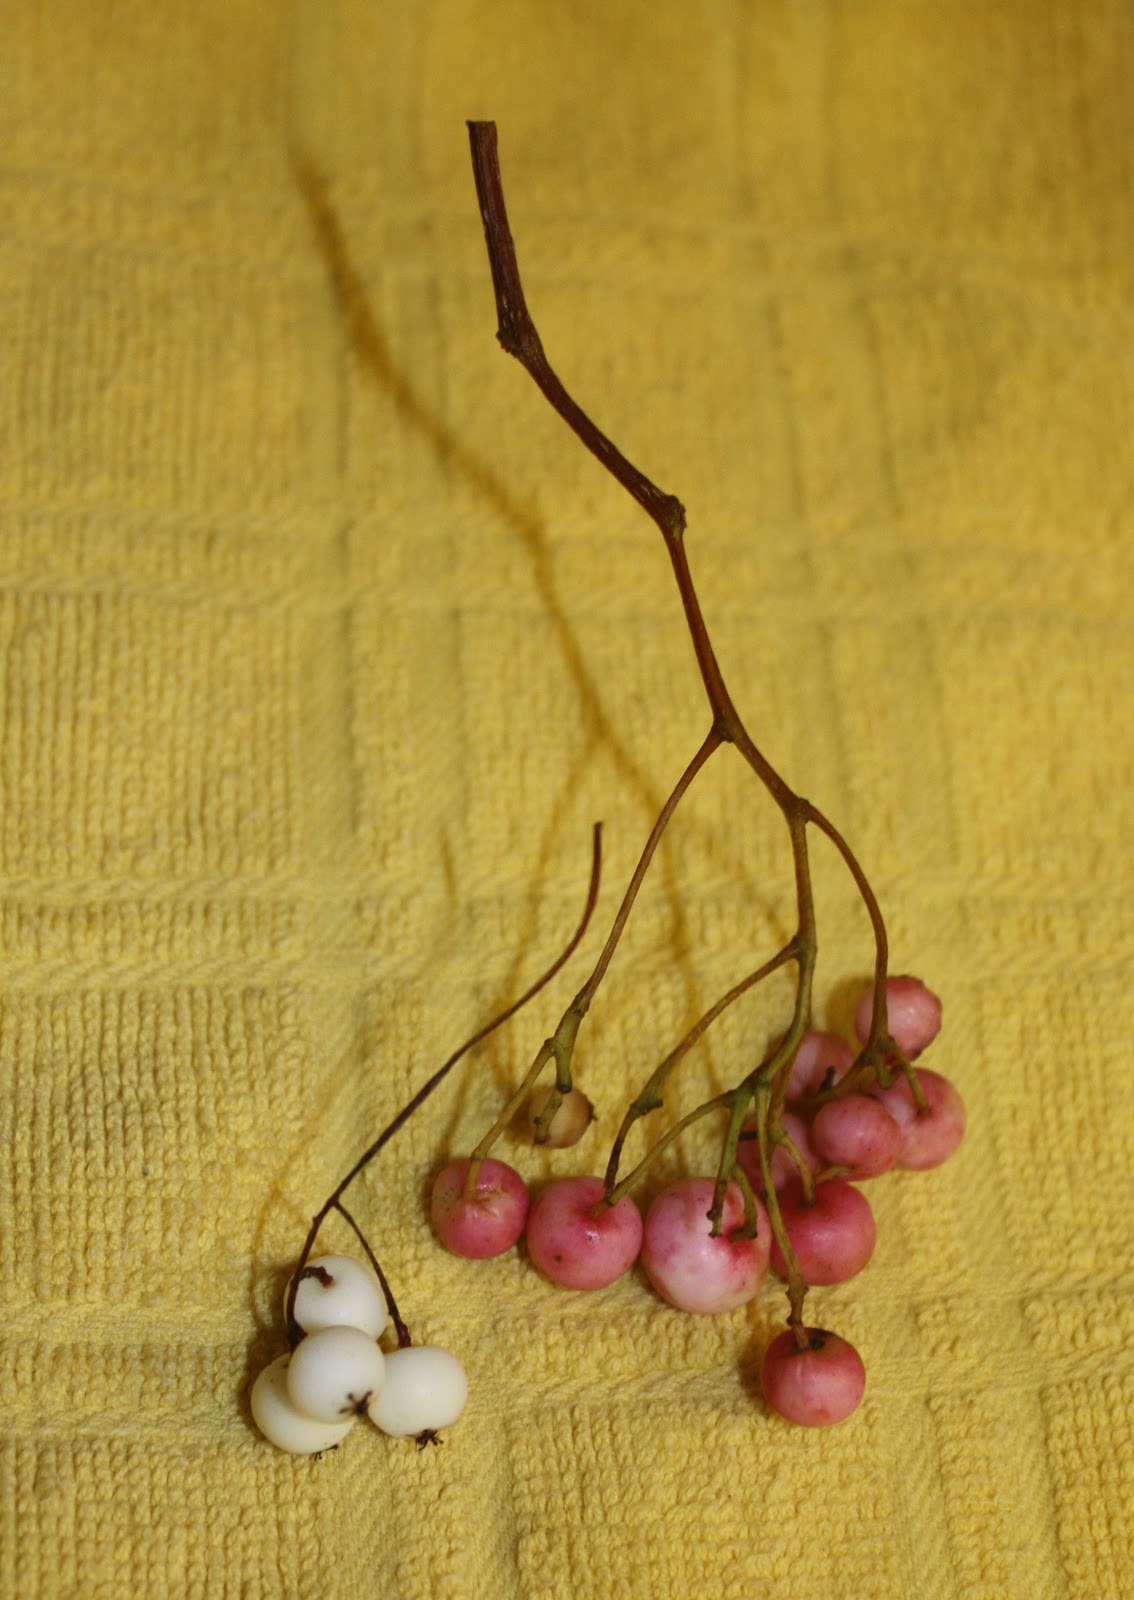
Other colors of mountain ash

I took a guided plant tour at the Arboretum last weekend and came across varieties of Mountain Ash that were white and pink. Anyone know if they are also edible?

Friday, October 28, 2011

The weather is cooling. Time for winter soups. The soup I'm posting today is a great way to use leftover parts of veggies that might otherwise get tossed. I grew some dent corn this summer; in Seattle, can you believe it? I got it from a local supplier, Uprising Seeds,  a 100% organic seed company,and was pleasantly surprised to find that it not only grew well, but didn't get all the buggy pests I fought with in the South. In this recipe, I have removed the kernals from the cobs for other recipes and am boiling the cobs in the stock which gives the soup a pleasingly light corn flavor. The other second use ingredient is fennel. Fennel bulbs are yummy, but it's a shame to throw away the stalks and fronds, and so this is how I made use of them. This is a veloute style soup. It has only a few ingredients, but takes a bit of time to make.

Sadly, we devoured the soup before I thought to take a photo, so I appropriated a photo of corn and fennel from a fellow blogger, the Vegetarian Chickie, because there must be some sort of photo on a post; but now I feel guilty using someone else's photo, so go check out her fennel and corn recipe! It lookes pretty yummy. You get two recipes for the price of one.

This is my recipe for Fennel, Corn and Fish Soup:

8 cups of broth, I used turkey
2 corncobs, cut in two, so they will fit into the pot
stalks of 1 head of fennel chopped into 1" chunks
1 large potato, 2 would make a thicker soup, cut into chunks
10 oz. salmon, cut into cubes, or flavorful fish of choice
1/4 cup fennel fronds, finely chopped
2 cups greens, I used assorted weeds from the yard, nutritious


First I simmered the corn cobs in the broth for a couple of hours. I suppose this could be done in a slow cooker, but I did it on the stove with a lid, so the liquid doesn't evaporate too much. Once the cobs had a bit of a tranlucent look, I fished them out and they went to the compost pile. Next I added the fennel stalks and simmered for about another hour, I left the bigger chunks which had softened up, but fished out the thinner tougher bits as they stay pretty tough, but have left their flavor. Add the potato, and simmer until just tender. Add the chopped greens and leave for about 3 more minutes. Remove the soup from the heat and allow to cool some before putting in the blender. Return the soup to the pot and reheat to a simmer, adding the fish. When the fish is looking done, add chopped fennel fronds.

Some possible additions for serving might be a dollop of sour cream or yogurt, or a pesto. For vegans, you could possibly use vegetable broth and tempeh instead of fish, but I think it will be a blander soup, you might want to add some carrots or corn kernals for more flavor. I personally never follow a recipe to the letter, experiment.

Enjoy!
 Let me know if you liked it.

Tuesday, October 4, 2011

September, for me, was blackberry month. Blackberries were late coming this year and then they hung around for a long time. yippee!

I made a full size batch of blackberry wine which is in the carboy fermenting. Last year I only got to make a small batch, so that was first on my list this year.

I also made a small batch of blackberry mead, using a recipe from First Ways blog, which is an excellent blog with photos and step by step instructions.

I also made a pie, of course, but having already done pies and jams during salmonberry and raspberry season, I was looking for some variety. I made a blackberry chutney, that tasted alot like cranberry sauce; so I froze some for Thanksgiving. Made a recipe from Martha Stewart for blackberry/red wine jello.
A blackberry cheesecake.

By then I'd had about as much sugar as I could swallow, I don't have a huge sweet tooth, so I tried some less sweet ideas. Blackberries added to oatmeal. Blackberries added to my kombucha (shown next to the raspberry kombucha made last month)

I re-use glass jars cause I don't like to use plastic.

Blackberry kefir smoothie; which did have some honey.

And then I decided to try some non-food ideas.
Blackberry ink, which is the juice with some salt to preserve it. I'll post some pics once I get creative with it.

And finally, I'm trying out using it as a dye, although the sites I found said that the color will wash out and brown out with washing and light exposure, but it seemed like a shame not to try to capture some of that gorgeous color!

After all that, I still have a couple of containers of berries frozen for deep winter when I will crave a warm pie.

I understand why people don't like the blackberry vines here, as they are very invasive, grow fast and the thorns are not fun. The Blackberry Goddess demands payment in blood! The berries are wonderful, though.
So far, I don't have much competition in picking them; all this was from a half block area at the end of my street. I noticed the hazelnut bushes after the season had passed by a couple of weeks, next year I'll have my eye out for those, too. You can never have too much free food!


Monday, July 4, 2011

more recipes at Hunger and Thirst's blog

Some of my stinging nettle recipes can be found this month at Hunger and Thirst 's blog. A dynamic duo of bloggers sets a challenge using a wild foraged ingredient each month and at the end of the month, the Wild Roundup is published with all the recipes everyone has sent in. There were @ 30 recipes this month! It's a great way to learn about wild edibles and their uses.


Sunday, June 12, 2011

seaweed foraging

Last Saturday, we finally had a beautiful sunny day here in Seattle. It was a perfect day for a talk on wild seaweed foraging, led by Melany of Essential Bread. It was a fun and informative talk at a local park, probably not a good place to forage on a regular basis due to urban pollution; the park was packed that day! But there was alot of life in the water. To harvest seaweed in WA, you will need a Shellfish/ Seaweed license, but they're not expensive and you can get one at Fred Meyer's or other outdoor recreational stores. As always, it's good to learn from someone local that knows what they're doing before putting anything in your mouth! The best time to forage is at low tide when the shallow water offers up her bounty. Check on the government site for regulations and resources: http://wdfw.wa.gov/fishing/regulations/  Western WA has alot of wild edibles, so it's a good thing to learn to recognize what's edible. Here are some photos:
Irridescent Seaweed

Turkish Towel

ok, the starfish is not edible as far as I know, but it was pretty.

I did harvest a bit of seaweed to try out, although I'll look for a place a little further away from the megatropolis for future harvests. I wanted to try out some of the examples we looked at. yum.