Friday, January 13, 2012


Stinging Nettle Beer in time for spring. Last week it was very warm for winter here, and some of the early spring greens started trying to grow. It's back to frost, but it reminded me to be prepared when Spring does come to visit. One of my favorite recipes from last year was this stinging nettle beer recipe adapted from several recipes in Sacred and Herbal Healing Beers, one of my bibles for fermented beverages.

Stinging Nettle Beer
5 gallon pail of nettles
Large handful of cleavers
Large handful of dandelion leaves
2 inch piece of gingerroot, shredded
2 lbs. sugar
1 packet Premier cuvee dry wine yeast

Place the washed plant matter and ginger into a large pot and add enough water to cover. Bring to a boil; lower heat and simmer for about 15 minutes. Strain, squeezing out juices and stir in sugar while still quite warm. Add plant fiber to compost as nettles make a fantastic compost addition. When the liquid is lukewarm, add yeast and pour into carboy. Add additional filtered water until you have 5 gallons. Place airlock on top and let ferment for several days. Once fermentation has stopped, beer can be bottled. To get a nice fizzy beer, add a tsp. of sugar to each bottle before closing and shake. If adding sugar, wait about a week to try one. Last year, using the same amount of sugar in each bottle, I had varying rates of carbonation. This recipe can be done without the cleavers and/or dandelions. Dandelions add a bitter edge to the beer, but are very nutritious. I started using the dry wine yeast for herbal beers at the suggestion of the guy at the brewery supply  store and it really does give herbal beers and ciders a superior flavor.
Sacred and herbal healing beers: the secrets of ancient fermentation [Book]

This herbal beer could be considered a traditional spring tonic; it's high in minerals and ginger is a digestive aid. It's a nice excuse to drink a fresh herbal beer. I like these for the nutritive qualities, but also as a gluten-free person; it's a beer that I can drink. Cheers.

Saturday, December 24, 2011

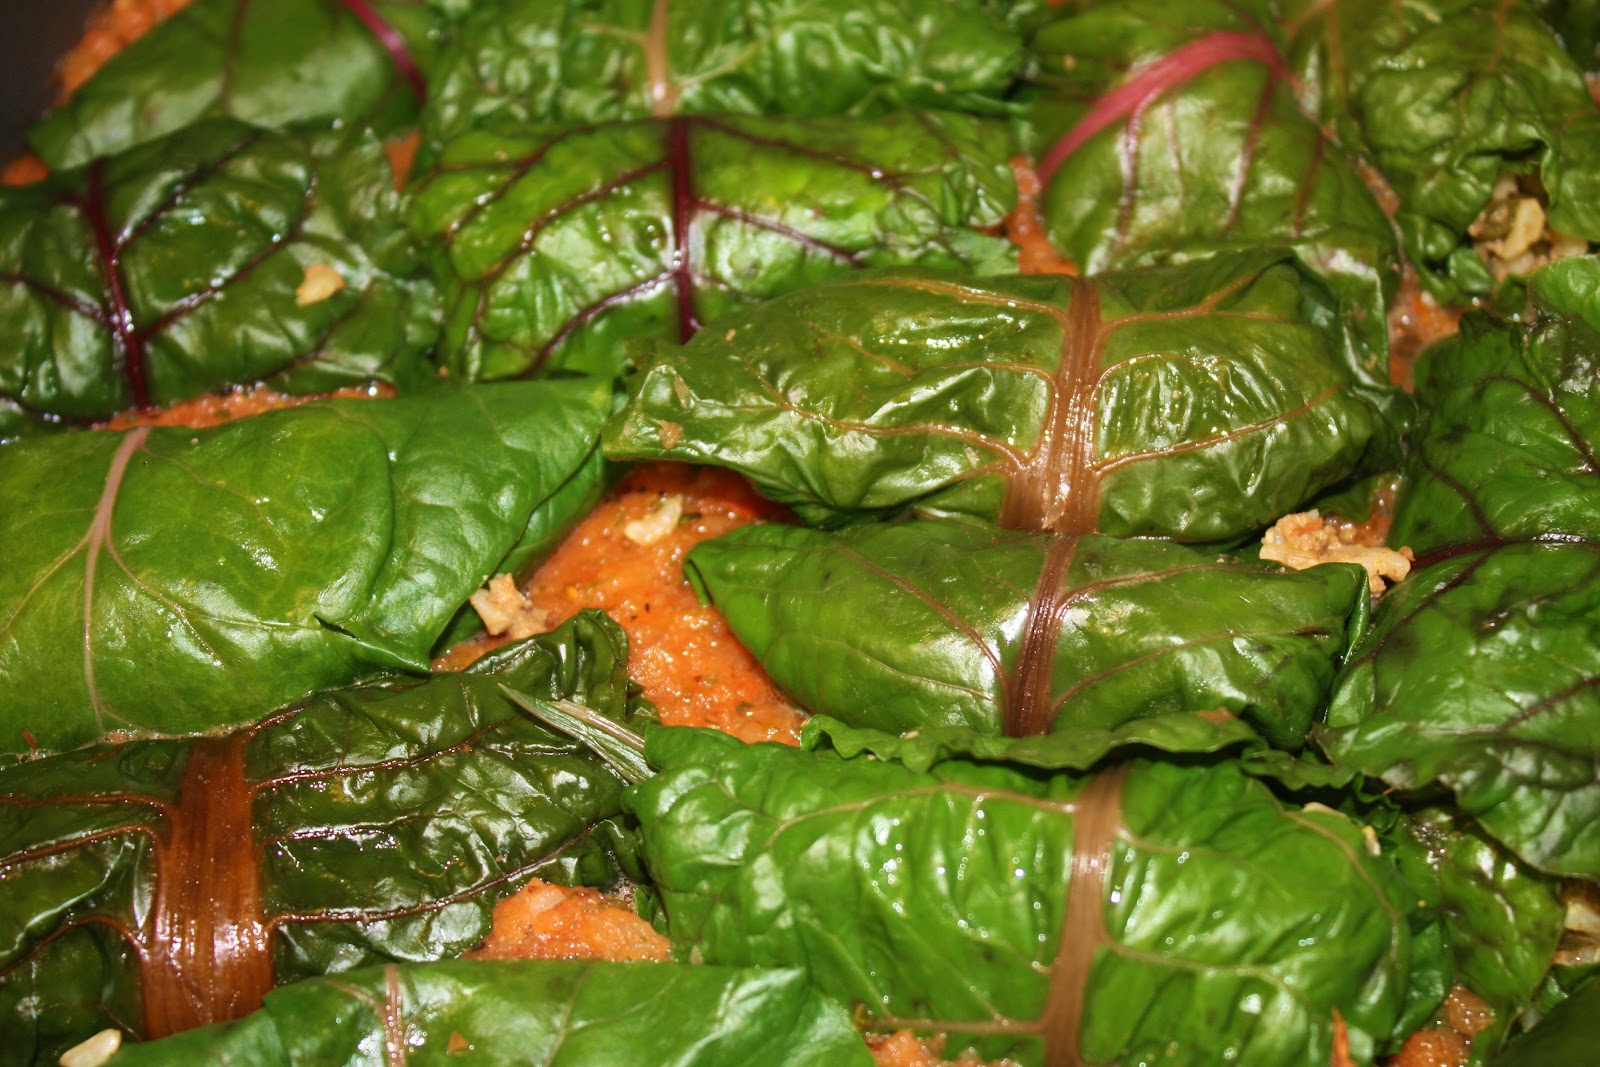
Dock Rolls

In anticipation of the coming spring greenery, and because I haven't managed to construct a simple cold frame as of yet.... here's one of my favorite recipes for Dock leaves. What I find around Seattle is Broadleaf Dock or Rumex obtusifolius , although there are several kinds of dock plants. The plant contains tannins and oxalic acid, which are classified as slight toxins and laxative, although so do alot of other plants we eat. I blanch and then cook them, so I haven't noticed any issues. If you are sensitive to other plants with oxalic acids you might want to avoid them. Any time you forage for plants you have never eaten before, be sure you are correctly identifying the plant and try just a small amount the first time. Learning from an experienced local is always a good idea. That said, like most greens of spring, dock is also known as a liver tonic.


Dock Rolls

@ 16 medium to large broadleaf dock leaves
3 tbsp olive oil
1 lb. ground turkey or lamb
2 cups of water
1 onion, diced
1 cup of rice
2 tsp. pumpkin pie spice
pinch of salt
2 tsp. each of ground cumin and ground coriander
2 tsp. chopped parsley
1/4 cup raisins
1/4 cup chopped nuts of choice, you could use almonds, walnuts, pine nuts, hazelnuts
2 cloves of garlic minced
optional, parmesan cheese

Sauce
15 oz jar tomato sauce 
1 clove garlic, minced
2 tsp. ground cumin
2 tsp. ground coriander
salt and pepper to taste

In medium saucepan bring to a boil meat, onion, garlic and spices. Take off heat and let sit for @ 10 minutes, then drain reserving 1/2 cup and save the rest for another purpose. (makes a nice base for a soup stock, for instance). Put strained meat and onions into a large bowl and add rice, salt, raisins, parsley, and nuts. Mix.

Pre-heat oven to 350*

In a medium pan bring some water to a simmer. In batches, dip the dock leaves for a few seconds each and then rinse with cold water in a colander. This step is a pain, but it seals the nice bright green color in the leaves so they don't turn brown in the baking dish. This is true whenever you want your greens to stay a nice bright green. Drain the leaves. Lay a leaf on a plate and put a couple of spoonfuls in the middle of the leaf; fold in the sides slightly and roll up. Place each one as finished with the rolled edge down, in a baking dish, 9 x 13" . I have also done this in a large skillet with a fitted lid at low heat.Mix together all ingredients for the sauce and add reserved juice from meat.  Once all the rolls are in the dish top with the sauce. Cover dish with foil and bake for about 35 minutes. Dish should be bubbling. If desired, top with parmesan or other cheese and bake uncovered for another 5 minutes. Enjoy.


Thursday, December 22, 2011

Preserved Lemons

Yay! It's that time of the year..... time to preserve lemons. I love preserved lemons. They are a great way to put up your surplus or put aside lemons for the year while they're in season and a lower price. I like Meyer lemons, but any variety will work the same way. You only need two ingredients, lemons and salt, but traditionally, herbs and spices would be added for a more complex flavor. I like fennel seed and bay leaf, which are fairly traditional, and both of which can be found growing in the Pacific NW. For my container, I can fit 7 lemons, which will last me pretty much till next year depending how much I use them in cooking.

7 lemons
@ 1/2 cup of pickling or sea salt

I don't measure, so 1/2 cup is an estimate. You can't use table salt for this because it's not a pure salt product; it's like salt food product, highly processed with additives. It must be "pickling" salt or sea salt that is not highly processed, think Celtic sea salt.

Wash lemons and cut through as if in quarters, but leave far end intact. If there is a piece of green stem, trim it off. Sprinkle a little salt, and spices, if using in bottom of container. I have a mason type jar that is missing the rubber seal, so it allows air to leave. You can use a fermentation jar, but close loosely so there is a small amount of air flow. Cut the lemons as described and squeeze juice gently into jar without breaking lemon into pieces. I remove as much seeds as possible at this point because they are inedible, but without breaking apart the lemons. Leave any that are too hard to remove. Place lemons in jar, sprinkling some salt inside of each lemon as you go. After first layer in jar, sprinkle some more salt. Continue till all lemons are in jar. Sprinkle more salt on top and press lemons down into jar with wooden spoon until the juice is covering them. Close container and set aside for 3-4 days, and after that, refrigerate and enjoy! Fruity sunshine in winter.


Wednesday, December 14, 2011

Beautiful Skies

Yesterday was a day of completeness. Both sunrise and sunset were magically delicious. This is what greeted me as I went out the door in the morning:


And this is how the day waved goodbye; the sun is an awesome star even when its' light only reaches me indirectly:


Friday, December 2, 2011

Tea Eggs

I'm sure every other foodie out there has already tried their hands at these, but this is my first try.


Tea eggs are boiled eggs, that are then cracked all over with the back of a spoon; but leaving the shell as intact as possible. The eggs are then simmered for quite some time in a tea bath with other spices and herbs. I decided to skip soy sauce, being gluten free, but you'll want to add a salt source; black tea, orange peel,and star anise. 


I read wildly varying amounts of time for simmering the eggs, from 40 minutes to 5 hours. I went with about two hours and I would try a longer time or more concentrated bath. Still they were really tasty with a subtle hint of all the flavors. The sauce seeps through the cracks to flavor the eggs and leaves pretty designs, which can be much darker than what I did.


I'll be trying this again, with other spice combinations, like Madrone bark, as suggested in a blog my friend Nina posted, from Hunter, Gardner, Angler, Cook 

Thursday, November 24, 2011

Happy Thanksgiving!

Hope you are all having lots of food and good times. 


I got roped into making a very different recipe by my bf, who wanted a garlic onion pie. He did help make it. I said, a tart? No, a pie, a dessert. No dairy. Hmnn. Well, I put together a recipe using coconut milk, and it was fairly tasty in an odd sort of way. It hasn't aged well, and he won't eat any, so I think the rest of it will end up on the compost pile. He says next time, he'd rather try for something quiche-like. Luckily I had also made a regular pumpkin pie.


Sunday, November 13, 2011

Corn Dolly

A corn dolly. I knew I wanted to make one of these when I was growing my corn, but I didn't imagine how beautiful these corn husks would be.

She is the embodiment of my own personal Fae, an assignment I was given by Shannon of Herstory , during a reading from Brian Froud's deck, in which she pulled a blank card as the space to create our own personal Fae. Intuitively, I'm tying this in with the Queen of Cups tarot card, which is my personal court card. She's usually depicted as quite domestic, but she has her wild side, as she's the human embodiment of Gaia, nurturing and abundant, but like her helper Calypso, doling out some storms when the air needs to be cleared. My dolly fae is made of Indian corn, half domesticated, half wild, bringing the best of both ways, knowing the benefit of a warm hearth and cultivatable nourishment, while retaining her wild strength, vigor and beauty.

I've saved the rest of the husks (Ok, I just had a tiny circle of corn) to use in my second attempt at natural dyes. The color of the husks is so pretty, I hope it will stay in the yarn, unlike the blackberry fiasco. The color was so pretty at first, with the blackberries, but just washed most of the way out; which led to a 2nd attempt with a different mordant, giving me a mottled, dull medium brown, my least fave color in the world. Which lead to more overdying attempts using hibiscus tea, roses and lavendar with salt, which was a slightly warmer color of still ugly brown..... which lead to my final desperate attempt to make this yarn something I would ever use, by overdying with red food color, the little bottles from the spice aisle. It's a prettier mottled brown with bright red tones that I'm going to use for my first sock knitting class next week at the Yarn Stash . I'll post some pics when they're done.


For an alternative image of the Queen of Cups, check out my friend Magi's Tarot of the Pomegranate